(714) 680-5500 • eMail: KC.5150.HEAT@ gmail.com
Handgun Cleaning - SEMI-AUTOMATICS

Read This Before You Clean Your Gun Again
Cleaning guns has a bit of mysticism attached to it. If you only clean your gun with a certain frequency or use a specific lube the full moon will rise, the stars will align, and everything from accuracy to speed will fall into place. Reality is different. Opinions abound on cleanliness and gear, making it hard to know where to start. I say start with the basics: What should you do and have on hand before cleaning your gun.
The Four Golden Rules
Every facet of firearms use begins and ends with safety. If you haven’t already, memorize the four universal gun safety rules.
- All guns are always loaded.
- Never let the muzzle cover anything you are not willing to destroy.
- Keep your finger off the trigger until you’re ready to fire.
- Always be sure of your target (and what is beyond it).
Before cleaning your handgun, you must make certain it is empty. That means dropping the magazine and racking the slide to clear the chamber. Do this even if you believe the chamber is not loaded. Remember, all guns are always loaded. Once you rack the slide, lock the slide open and double-check not only visually but by touch. Same goes for revolvers. Empty the cylinder and check the barrel visually and by touch. Never assume.
Cleaning Supplies
Sure, you can give your handgun a basic cleaning with only a fistful of Q-Tips and some lube. But if you want to do a thorough job, you’ll need more. These are the supplies I suggest:
- Manual or assembly guide for your gun;
- Non-slip mat to protect the surface you’re working on, as well as the gun and the parts when laid out (also keeps things from sliding and rolling away);
- Non-marring hammer (Brownells 1-inch Nylon/Brass Hammer);
- Magnetic-tipped gunsmith screwdriver set (Brownells Magna-Tip Screwdriver Set);
- Allen key set, if applicable (Bondhus Gorilla Wrench Set);
- Safety glasses;
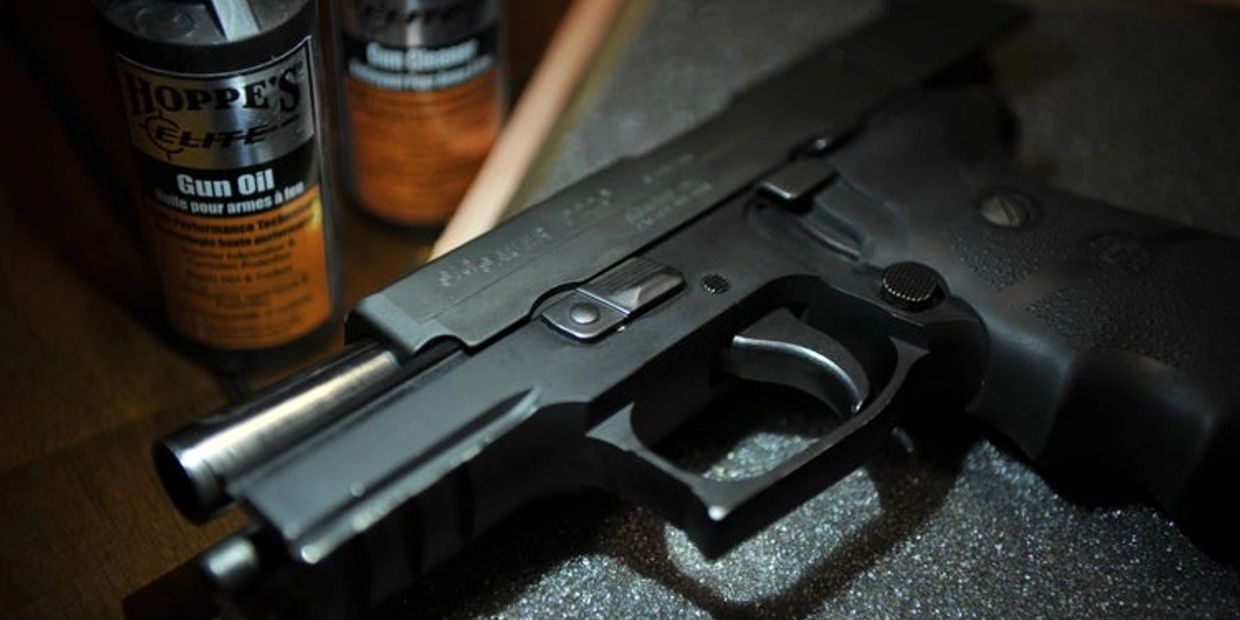
- Gun CLP and/or lubricant (SEAL 1 CLP);
- Cleaning kit or the parts found in one:
- Patches, like the pre-saturated from SEAL 1
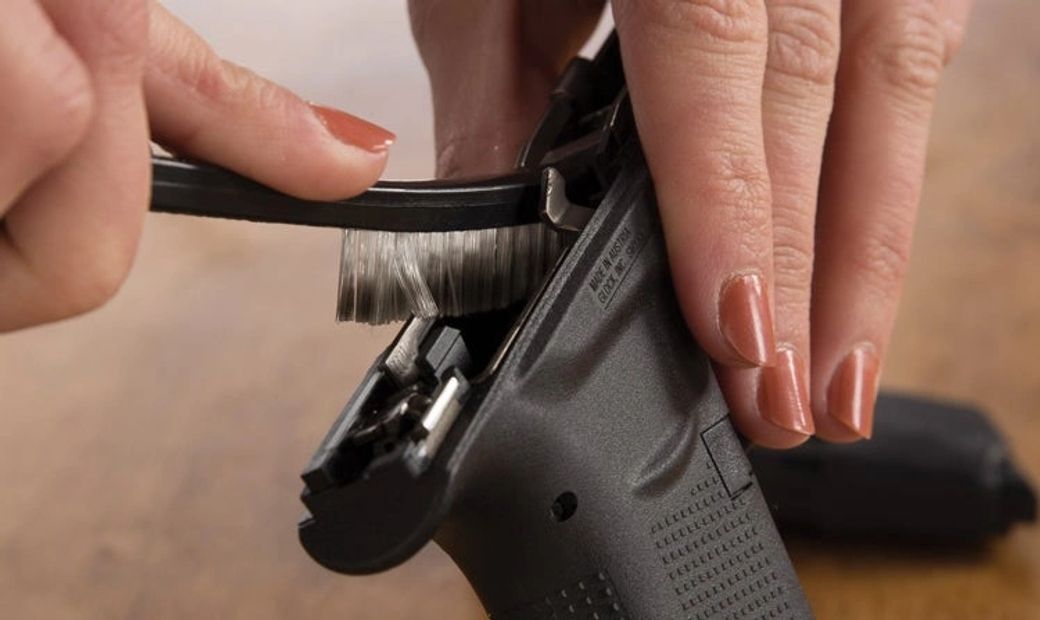
- All-purpose cleaning brushes
- IDT Bore Brush from Otis
- Cleaning rod and loop such as those made by Brownells
- Pierce-style cleaning jags made by Sinclair;
- Rag or paper towels; and
- Cotton swabs
You may need more specific supplies based on your pistol. For example, a disassembly pin and auto bushing wrench (often shipped with your gun) for 1911s. If you have a revolver, you may want tweezers, a pin punch and a rebound slide. For Glocks, I recommend the Real Avid 4-in-1 Glock Tool.
Tip: Consider taking pictures with your smartphone as you disassemble your gun. This gives you images to reference if you forget which way a spring should face or where a pin belongs.

So Many Opinions
Debate roils over the topic of how often you should clean your piece. Many in the gun world offer advice that falls under “do as I say, not as I do.” So, what’s the right answer? It varies.
Range Safety Officer and longtime shooter David Werner suggests cleaning your gun with every use. “Cleaning schedules vary massively according to usage,” he said. “There is no standard. Use cleaning as a time to learn about your gun and its parts. Disassemble it, clean it and reassemble it.”
Werner acknowledges that for many gun owners, cleaning with each use means only a few times a year. He added that you should not store your gun dirty on a long-term basis, so clean and lube guns before storage in your safe. As for lubing, Werner said your handgun should be well-lubricated but not so lubed it’s running down the grips. A little goes a long way.
Gail Pepin, producer of the ProArms Podcast, former champion of Florida State IDPA and Florida/Georgia Regional IDPA female champion, takes a different approach. She’s a high-round count shooter and carries out a full cleaning of her Glocks once a year. During that annual cleaning, she uses either Rogers cleaning products or Dawn dishwashing liquid. The dish soap tip is gleaned from Massad Ayoob Group Senior Staff Instructor David Maglio.
“I put everything in a pan of water and Dawn to soak. Then lather, rinse, repeat,” Pepin said. “Then I lubricate the guns according to Glock specs. Throughout the year I boresnake them as needed with some CLP.”

Frequency
Frequency depends on how often you shoot, what ammo you shoot and your specific model. Some ammunition is dirtier than others and some handguns require more cleaning than others. You will find precision rifle shooters prefer a fouled barrel for greater accuracy and only clean when the groups begin to expand. Conversely, when I’m taking a high-round-count handgun class, you’ll find me cleaning and lubing my gun every night. I’ll also inspect key parts and ensure the pistol will perform well.
My plastic guns are cleaned far less frequently than my 1911s and revolvers. A complete inspection of my revolvers takes place once a year — at which point, I check out small parts like the hand and hammer stirrup pin.
With time you will learn what ammunition is dirtier (Winchester white box) and how often your specific gun needs to be thoroughly cleaned. Yes, most guns can run dirty. But they can be prone to failures and possibly even breakage if they get filthy enough. If you’re talking about your concealed carry or home-defense gun, the answer is simple: That gun should be lovingly maintained and lubed. You cannot afford a piece of grit causing a failure when you need it most.
When in doubt, clean, inspect and lube.
Read the article here: Read This Before You Clean Your Gun Again By Kat Ainsworth
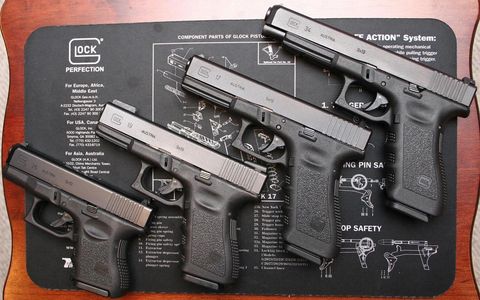
Colt 1911s like the example pictured above tend to require a bit more cleaning and care than guns such as Glocks as shown in the opposite panel.
HANDGUN CLEANING- REVOLVERS

How to Clean Your Revolver
If you were to count every revolver model and variant on the market, the running tally would climb into the hundreds. For example, depending on production year and model, your revolver might have three, four or five screws. You’ll quickly discover how many yours has when it comes time to clean your revolver.
Today, most revolvers incorporate three screws, although there are still some models utilizing the classic five-screw design. So, how do you clean your revolver? As you’ll find below, basic revolver cleaning is quite simple. Remember, manuals and properly executed revolver books are your friends.
Clear the Revolver
Before cleaning any gun, you must clear it. When you clear your revolver, take care to follow the four universal safety rules:
- All guns are always loaded.
- Never let the muzzle cover anything you are not willing to destroy.
- Keep your finger off the trigger until your sights are on the target.
- Always be sure of your target (and what is beyond).
Release the cylinder latch to swing the cylinder out away from the frame. Taking care to aim the gun in a safe direction, rotate the gun muzzle-up and push the ejector rod to empty the chambers. Now check every chamber of the cylinder by sight and touch to be confident there are no obstructions. It might seem excessive, but you can never be too safe. Accidents happen when we skip steps.
Here’s the catch: You will continue to treat the revolver as if it were loaded. Sticking to these practices turns them into a habit, and safety is the greatest habit you can hone as a gun owner.

The Takedown
When you’re only doing a basic cleaning, there is not much involved with prep work: Swing the cylinder open and get to cleaning. In this case, let’s assume you want to do a basic cleaning plus a little extra … but not a full inspection. As a general rule, you only need to perform in-depth field-stripping and inspection once a year.
1. Verify your revolver is empty, as outlined above.
2. Remove the grip panels or sleeve. If one of the grip panels sticks and you’re sure the screws are completely loosened, use the tip of your finger to carefully nudge the panel free of the frame. Don’t pry at the edges of the panel with tools because you might scratch or gouge the panel or the frame beneath it.
- You should use gunsmith-specific screwdrivers rather than whatever is in your household toolbox. When screwdriver bits don’t fit precisely, they can slip and permanently damage the gun. For example, if they’re too large, the overhang can scrape and gouge your revolver’s frame. Also, oversized bits will not fit if the screw is recessed.
- For basic cleaning, there is no need to remove the side plate. This also means you will not be separating the cylinder from the frame.
- Separated from the frame or not, do not attempt to disassemble the cylinder. You can easily clean the cylinder and related parts without separating them from one another.
- Do NOT try to remove the barrel shroud and barrel from the frame. It is not necessary for cleaning and should only be done by a qualified gunsmith.
3. Release the cylinder latch and swing the cylinder out to be cleaned.
4. Your revolver is now ready to be cleaned. (Note: If you have a solid-frame, gate-loaded revolver, you will forego the third step and rotate the cylinder by hand — just as you would when loading or unloading — to access each chamber.)
Specs: Smith & Wesson 686 Plus
- Caliber: .357 Magnum
- Barrel Material: Stainless Steel
- Capacity: 7
- Action: Double-Action/Single-Action
- Frame Material: Stainless Steel
- Barrel Length: 4.125 inches
- Frame Finish: Satin Stainless
- Overall Length: 9.6 inches
- Grip: Black Synthetic
- Overall Weight: 39.0 ounces, empty
- Cylinder Material: Stainless Steel
Cleaning Your Revolver
You have endless options when it comes to cleaning products. I usually use SEAL 1, but I also have a bin of random cleaning products. Some work better than others, and some are meant for more specific uses. Find one you like and don’t stress over what is considered best by social media “experts.”
For simplicity’s sake, I’ll outline the cleaning process using SEAL 1, a non-toxic, environmentally friendly and multi-purpose cleaner designed to cut through carbon build-up while also lubricating and protecting.
In addition to cleaning after use, Smith & Wesson recommends cleaning and lubricating your revolver every time it is exposed to sand, dust, extreme humidity or water. The company also warns against excessive ultrasonic cleaning and prolonged immersion in solvents. Ammoniated or alkaline solvents should not be used ever. Use cleaning and lubricating products specifically designed for firearms.
1. Begin with the barrel. Saturate an appropriately sized brass bore brush with SEAL 1 CLP Plus Liquid. Move the bore brush through vigorously, pausing to re-apply your cleaning agent at least once. Using a bore brush will scrub the bore and loosen build-up, simplifying the next step. (Note: Always clean the barrel from the chamber end, not the muzzle end.)
2. Switch to a cleaning rod with a jag on the end and slip a SEAL Skinz through the jag. Skinz are pre-saturated, but if you use a dry patch, saturate it with SEAL 1 CLP Plus Liquid or another cleaning liquid. Run multiple patches through the barrel until they come out clean. When you’re satisfied, run one final saturated patch through the barrel.
3. Move on to the cylinder. Again, you’ll be using a properly fitted brass bore brush saturated with SEAL 1 CLP Plus Liquid. Run the bore brush through each chamber of the cylinder.
4. When you’ve thoroughly scrubbed each chamber, switch to the cleaning rod with the jag attached. Slip a saturated patch through the jag and run it through each chamber. Do this until every chamber is clean. Once they are all clean, run a final patch through each to lightly lubricate them.
5. Using a soft rag dampened with lubricant, wipe dirt off the frame. Pay attention to the area beneath the grips; dirt and dust tend to accumulate there.
6. When you are done, use the same soft rag to lightly coat the revolver with lubricant. Wipe excess fluid from the chambers and bore using a clean, dry patch on a cleaning jag.
7. Reassemble your revolver.
Cleaning your revolver is a relatively simple process. Whether you use your gun for self-defense, hunting or plinking at the range, you should maintain it lovingly.

Rust-Free: Tips & Tricks
Keeping Your Firearms Rust-Free: Tips and Tricks
Your firearm may be manufactured with plastic or wooden parts, but it certainly has metal components. And most metal is prone to oxidize or rust if left untreated. Rust on the metal of a firearm is not a good sign. While a small spot of rust on the outside of a barrel may not necessarily affect a rifle’s performance, it may mean there’s rust in or on other places of that same rifle. Rust on any of the mechanical workings of a firearm may have adverse effects on its performance and safety. You should take preventive measures and make sure your firearm is rust-free. Here are a few tips and tricks to make that happen.
Learn More
This is a content preview space you can use to get your audience interested in what you have to say so they can’t wait to learn and read more. Pull out the most interesting detail that appears on the page and write it here.
RUST-FREE: TIPS & TRICKS

1. Realize Lubricants Evaporate, Dissipate and Migrate and Simply Need to Be Replaced From Time to Time
Not all firearm lubricants are created equal, and some people prefer to use lubricants that are not necessarily meant for firearms. That’s a topic for another day. The key idea to realize here is that lubricants tend to evaporate, dissipate and migrate over time. These occur for various reasons. Heat and heavy use can, of course, contribute to a firearm’s lubricant diminishing over time. Additionally, even simple gravity can pull very light lubricants right off the metal of a firearm. Therefore, you should inspect a firearm for proper lubrication at regular intervals. Even the handgun you carry regularly — the one that always feels great and seems to operate flawlessly — should receive regular inspections in order to ensure it has proper lubrication.

2. Regularly Clean and Lubricate Your Firearm
While your inspection of a firearm may reveal its need for lubrication, make the lubrication the last part of a regimented cleaning routine for your firearm. Follow the manufacturer’s owner’s manual for proper cleaning/service intervals, but realize that a gun that’s carried or fired a lot will likely need more cleaning than will a “safe queen.” But even the safe queen needs care. You should thoroughly inspect and clean seasonal firearms, even in the offseason. The last thing you want to discover as hunting season draws near is that the gun not only has little or no lubricant in it but also has any kind of rust on it at all.
Most cleaning regimens usually call for the judicious application of some amount of lubricant to certain parts of the firearm. Again, follow the owner’s manual carefully. Often it’ll also call for you to apply a thin coat of oil to many parts of the gun. This film protects the metal from oxidizing or rusting.
Myth: A fireproof gun safe will protect my guns from fire.
It goes without saying that no safe is truly “fireproof”, every safe has its limit and will fail at some point depending on how it’s constructed. There are many variables when it comes to fires, no two are the same. In most home fires where the walls collapsed, the contents of “fireproof” gun safe have totally burned up. But you can also find some examples where cheap fireproof gun safes made it through less serious fires with no loss. In some fires, gun safes with thick steel but absolutely no fire insulation survived. It all depends on the details of the specific fire.
There are well-established fire rating standards in the safe industry, click and take a look/read.
Read the article here: Myth: A fireproof gun safe will protect my guns from fire.

3. Control Moisture in the Safe to Help Prevent Rust
If your firearm resides in a safe, it’s helpful to understand the level of moisture that can occur inside the safe and apply certain controls. Interior safe moisture can vary with geographic location, seasons, temperature, household conditions and other factors. If there’s a chance for harmful moisture to occur in your safe, use a moisture-control solution such as a dehumidifier (usually a device you plug in, running the power cord to an outlet through a hole in the safe, although some are cordless/rechargeable), silica gel packs, dry rice, baking soda or other moisture-absorbing means. Be sure to employ these methods in collaboration with regular cleaning and proper lubrication, not in place of it.
HOW WE HELP

Expert Firearm Tactics Instruction by Retired Law Enforcement Officer & Range Master
Giving good people the security they deserve and yet another reason to worship, educate or do business with you.
Through our partnership with both the NRA and the USCCA, 5150 HEAT Firearms Training Academy is thrilled to be able to offer men & women with several fantastic training courses.
Course enrollment is now open with space available. Call or Email Today!
For additional details, Let's Talk!
5150 HEAT Firearms Training Academy
(714) 680-5500

Firearms Marksmanship & Safety are Perishable Skills
Practice does not make perfect. Only perfect practice makes perfect. Vince Lombardi
Many people don't realize it, but firearm marksmanship and safety are perishable skills that must be continuously renewed and reinforced through “proper” practice and training. Every expert firearms instructor recommends regular range time or dry-fire training to both improve and maintain safe, speed & accuracy and the skills needed to ward off deadly attacks... Check back often!

Concealed Carry Fundamentals
Concealed Carry Fundamentals is a comprehensive course for anyone considering owning or carrying a firearm for self defense. In this class you will learn conflict avoidance, situational awareness; shooting fundamentals; the physiology of violent encounters, legal aspects of using deadly force (including knowing what to do in the aftermath); and a complete guide on gear, gadgets, and ongoing training. Following the course, training and live-fire exercises are conducted on the range.
HOW WE HELP
BASIC HANDGUN FUNDAMENTALS
BASIC HANDGUN FUNDAMENTALS
BASIC HANDGUN FUNDAMENTALS

This course is designed to give participants an entry level understanding of handguns and how to utilize them in self-defense situations. The curriculum is divided into four modules, each with several chapters. Classroom and Laser Pistol simulator time. Each participant will receive an excellent textbook: Concealed Carry and Home Defense Fundamentals. Intro to Laser Pistol training. CCW, CONCEALED CARRY Classes: Shall Issue, May Issue & Constitutional Carry firearms academy ccw classes Brea
HOME DEFENSE FUNDAMENTALS
BASIC HANDGUN FUNDAMENTALS
BASIC HANDGUN FUNDAMENTALS

USCCA, Home Defense Course, is a comprehensive course for every skill level that focuses on firearms as a tool for home defense. Ultimately, the goal is for students to develop a home defense plan. Plus, many more useful subjects! Intro to Laser Pistol training.
Each participant will receive an excellent textbook: Concealed Carry and Home Defense Fundamentals.
WOMEN’S HANDGUN TRAINING
BASIC HANDGUN FUNDAMENTALS
Certified NRA Police Firearms & Tactics Instructor & Range Master

Women’s Handgun & Self-Defense Fundamentals covers the basics — along with the fun, seriousness and importance of being a responsibly armed female. The basics of shooting will be introduced, reviewed & built upon, while also exploring universal safety rules, situational awareness, common types of handguns, ammo types, marksmanship skills, advanced firearms handling/defensive essentials & the use of deadly force. Intro to Laser Pistol training.
Certified NRA Police Firearms & Tactics Instructor & Range Master
Certified NRA Police Firearms & Tactics Instructor & Range Master
Certified NRA Police Firearms & Tactics Instructor & Range Master

Certified NRA Police Firearms & Tactics Instructor & Range Master - Prior to my retirement from law enforcement I served as a Police Firearms & Tactics Instructor and Range Master with Brea Police Department since 1992.
CCW FUNDAMENTALS
Certified NRA Police Firearms & Tactics Instructor & Range Master
Certified USCCA Firearms Instructor & Range Master

CCW - Concealed Carry Fundamentals Course... This is an EXCELLENT course!
Concealed Carry and Home Defense Fundamentals is a comprehensive seminar for anyone considering owning or carrying a firearm for self defense.
Certified USCCA Firearms Instructor & Range Master
Certified NRA Police Firearms & Tactics Instructor & Range Master
Certified USCCA Firearms Instructor & Range Master

The mediocre teacher tells. The good teacher explains. The superior teacher demonstrates.
The great teacher tells, explains, demonstrates and inspires students to think!

Must be 21-Years of Age or Older to Enter Site
Welcome to 5150 HEAT! Check Out Our Content!
This website uses cookies.
We use cookies to analyze website traffic and optimize your website experience. By accepting our use of cookies, your data will be aggregated with all other user data.
